
Getting your pellet stove, fireplace insert, furnace or boiler ready for the heating season is essential. Proper planning and preparation ensures when the cold weather hits you’re ready. Follow these simple tips and guidelines to make sure your stove is ready. Every stove make and model is different; refer to your owners manual for specific guidelines and maintenance outlines. Please Contact us if you need the maintenance outlines for your stove model.
1. Remove the vent cap on the outside of your exhaust piping. Your exhaust should always be plugged at the end of the heating season to avoid moisture, bugs and rodents from entering into your exhaust vent and stove. 6″ Summer Vent Cap, 4″ Summer Vent Cap, 3″ Summer Vent Cap.
2. Thoroughly clean your exhaust venting with with a brush and rod kit. The fiber or rotary brush will loosen the ash inside your venting making it easy for removal. Browse our brush and rod kits.
3. A shop vac or ash vac will work to remove the loose ash, however the best tool to use is a leaf blower vac. This tool will remove 99% of the ash from your exhaust vent pipe, combustion blower, combustion housing, back firewall and heat exchange area. TIPS: Use the SUCKING end of the blower on your outside exhaust vent termination. (Provided adapter will go to either 3″ or 4″ venting.) Close all the windows of your home and neighboring windows if they are close by. Remove any clothing hang-drying outside the home nearby. Turn your stove on or to ‘test’ mode for Harman models. Have another person inside the home opening and closing the firebox door WHILE the leaf blower vac is running. If applicable on your model, have that person also moving the heat exchange scraper back and forth while the leaf blower vac is running. Allow the leafblower vac to run until no more ash or soot is coming out (Typically 30 seconds to 1 minute).
4. Remove both your combustion fan and distribution/room-air fan. Vacuum out loose ash and soot from your combustion fan housing. Use a dry paintbrush to remove dust and hair from your distribution motor fan paddle blades (If you can take outside and use compressed air that is the best for removing all of the dust and hair accumulation). REMEMBER- Gasket seals must be replaced before re-installing your motors back in place. We carry all OEM gaskets and for the most cost efficient route you can purchase a sheet of the gasket material and trace/cut your own out. NOTE: Some stove models require fan lubrication. These models will have oil ports indicated on the motor/s. It is important to never over oil or lubricate. Just a couple drops will do the trick. An all purpose oil or sewing machine oil will work perfect. If you are unsure if your motors require lubrication please contact us.
5. Remove your inner firebox brick panels, firewall panels, top heat exchange panels and ash traps- Varies based on stove make and model. By cleaning out excess ash your stove will run more efficient and it will operate at a higher performance level. Using a dry paint brush and small bottle brush works great in removing excess fly ash from these areas. NOTE- We recommend wearing a mask of sorts as to not breathe in any ash while cleaning. TIP 1- Have your stove turned on or to ‘test’ while cleaning the inside of your firebox. With the door open your stove will not feed pellets, yet your combustion fan will be on sucking the ash in vs. allowing it to escape into the house. TIP 2- Lay down a drop cloth at the base of the stove to ensure fly ash doesn’t get on your carpet or flooring. Using gloves such as latex is highly recommended to keep ash off of your hands for easy clean-up.
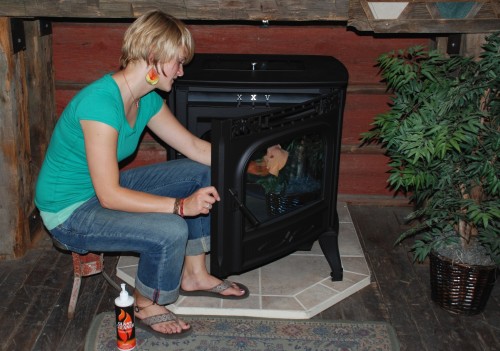
6. Check your gasket seal on the firebox door as well as the ash pan and hopper door if applicable on your unit. Using a dollar bill or piece of paper is a great way to check your seals. Simply insert half the dollar bill or paper into the door, close it, and pull it out while the door is shut. There should be a good amount of resistance when doing this. Check multiple areas around the door to ensure the seal is tight all the way around. We offer replacement gaskets for every kind of stove and application at the guaranteed best price. Browse Our Gaskets.
8. Inspect your firepot/burnpot. Make sure all scale and carbon build-up is removed. Make sure all air holes are open and clear. Use a small screw driver or paperclip to poke any plugged holes through. If you see any warping or areas burned through you must replace your firepot. We carry firepots for virtually every pellet stove. Browse Firepots. If you have a Harman stove model, these handy scrapers will make your life ten times easier removing buildup from your firepot. Harman Specialty Scraper Tool.
9. Remove the pellets or biomass fuel from your stove’s hopper. Use a vacuum to suck up any accumulated fines that have built up by the base of the auger shaft. We recommend this to be done after each ton of pellets or biomass fuel burned on average. Built up sawdust or fines can result in auger jams and additional stress on your auger motor.
Hopefully these tips are useful and helpful as you prepare for the heating season. Further questions, comments or concerns please leave us a comment below. Subscribe to our YouTube page for Videos and Service Support. https://www.youtube.com/c/EarthSense.
Thank You!
You have one of the most informative troubleshooting discussion boards I’ve ever seen! Thank you for all the advice. I tried to fire up my Winslow PI40 insert for the first time yesterday. It gave me a few issues, but I was able to use the manual to simply see that I hadn’t sealed/shut the door correctly after my summer cleaning of the stove. This morning, I went to start the stove, and all I received was a steady green “ready” light, and nothing really. NO pellets were coming out of the auger into the burn pot. I heard a tinkering noise and that was it. There isn’t anyone who services pellet stoves in my area, it’s just me! The closest repair service is 40 miles away. I replaced the igniter last April with some help. Thank you for any feedback. I can’t seem to figure this one out.
This is a great, no-nonsense guide for residential pellet stove owners. Ours is a no-name, unbranded style we purchased several years ago, for which we have no printed material. Reading this information and heeding all the tips will ensure efficient and safe heating for many seasons! Thank you for providing this valuable service! Working only from an ancient cell-phone, I’ll be referencing this site often! Stay cozy!
Hey Lawrence,
Very happy to hear that this has been helpful for you. If you need anything at all please let us know, we are always happy to assist in whatever way we can. Any future questions or needs please feel free to email direct at [email protected].
Thanks again and warm regards,
Taylor-ESESstoves
Hey Miranda,
Thanks for your comment here. I wanted to make sure that you have been followed up with a taken care of. We have a wealth of knowledge when it comes to the Winslow pellet stoves and we stock every part for that line. Please let me know if you need any further assistance and we’ll make sure to get you taken care of right away.
Thanks again and warm regards,
Sincerely,
Taylor-ESESstoves